A Bi-Monthly Magazine
Borrowing From Yesterday To Do the Work Of Today
Offering Resources to Promote Self-Sufficient & Back-to-the-Land Living
Converting a Western Style Harness to a
D-ring Harness
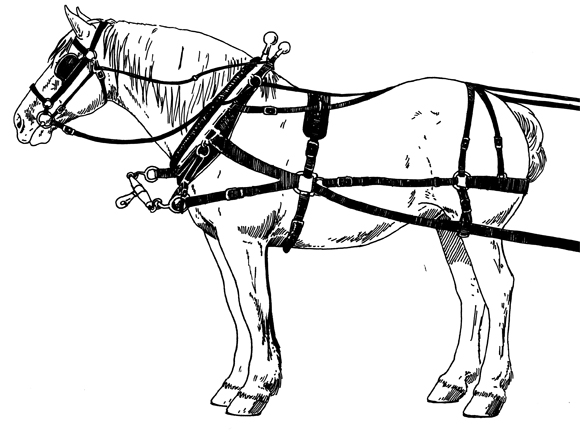
Illustration by Bethany Caskey
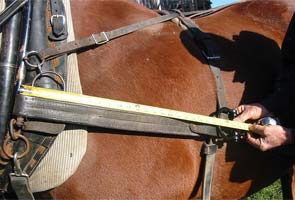
it places all the tongue weight and tongue vibration on the horse’s back saddle and away from the collar and neck.
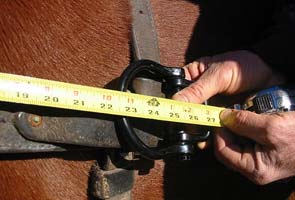
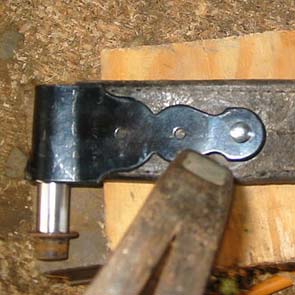
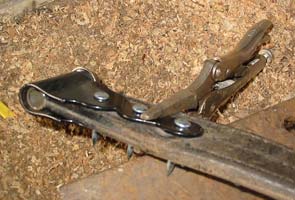
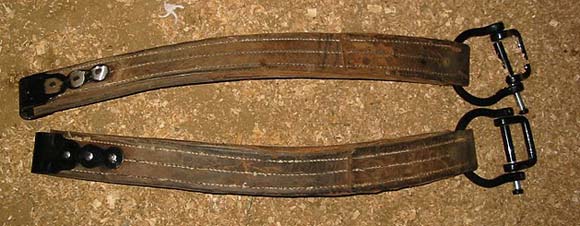
All the force of pulling, backing, and tongue weight go through the D-ring; which is located at the center of gravity for the horse. The D-ring is held securely in place regardless of a high hitch or a low hitch; ensuring that the angle of draft from the front tug and hames is consistently 90 degrees. The D-ring is supported by the back saddle.
This harness has been in use for many years, and Les Barden, a lifelong New Hampshire horse farmer and logger, has done much to introduce the harness and its benefits to a wider audience. Several years ago, Les produced a video that demonstrated all of the harnesses properties. (This video is available on our website www.mischka.com/shop).

My first reaction to the D-ring harness was,
“That looks like a nice harness, but I already
have six horses and mules in harness, I could
never afford to change.”
In the last few years I have been putting dolly wheels on my mowers and using a three-wheeled PTO cart, so most of my tongue weight issues had already been resolved. This past fall, I finally watched Les’ video and saw one thing that I had not paid much attention to before. Even though the tongue weight is the big thing everyone talks about, the D-ring harness also does the same thing with all the vibrations and swinging to and fro. All this energy is absorbed through the harness and back saddle, and none of it goes to the neck. I have never really sored a horse or a mule neck, but I have certainly left my share of wrinkles that I watched carefully to make sure they healed (do we really need this?). I started to wonder how much of this was due to the vibrations and tongue pulling on the collar in turns and corners.
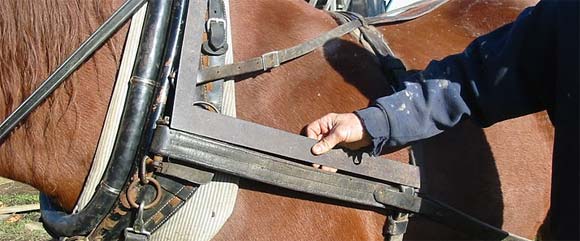
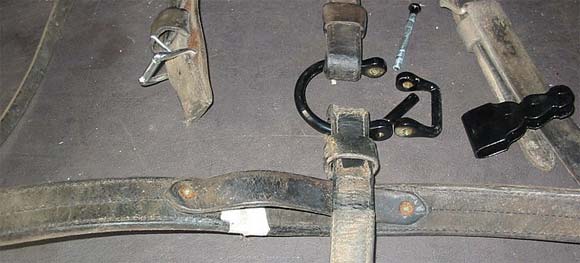
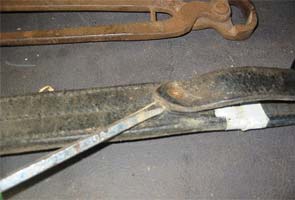
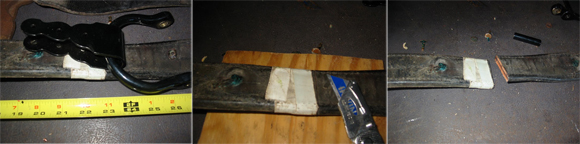
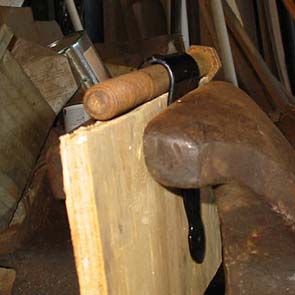
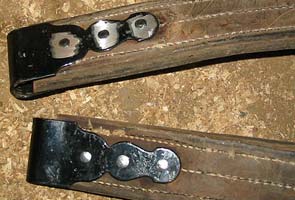
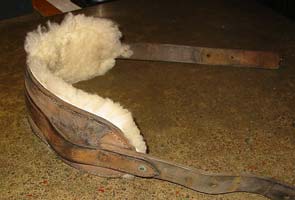
I decided to try remaking my own harnesses into D-ring harnesses. While there are many little steps, the main one is cutting the tug and adding repair clips to each end so they would fit on the D-ring. This is obviously not work for the faint of heart. The first step is to evaluate the harness for overall soundness. All of my harness is hard working farm harness of unknown origins, and, on every harness, I found at least one or two important repairs that I would have to make as I was converting to the new style of harness. It is important to remember that in the western style harness there is very little strain or weight on the market straps or back saddle. I sent two of my back saddles and one of my britchens to an Amish neighbor to have stitching replaced. I also added a few copper rivets, something I do most winters anyway, just to hold the rest of the harness together.
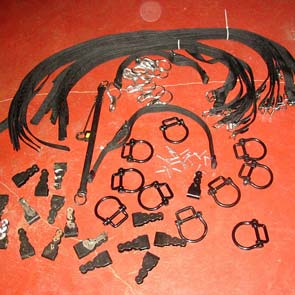
The next step was to order parts. I chose to buy from Peach Lane Harness Shop, in Ronks Penn., as I had other business in Lancaster County. Most harness shops can help with these parts, although some will not be familiar with the D-ring harness. I spent about $450 to convert five harnesses. This included new front and rear nylon hold backs (four per horse), steel repair clips with rivets (four per horse), two D-rings, and two large round snaps for the yokes. This also included four steel jockey yokes. Not to be confused with a jockey stick used to drive an extra horse, the jockey yoke is also used with any side backer harness and is a short yoke that each horse wears to snap into a neck yoke. For my new side straps, I bought nylon straps. I probably saved about $15 per horse over buying leather. I now think I would have preferred leather on these straps. The rest of my harness is all leather.

Finally, it is a matter of putting the harness on the horse and adjusting it. The D-ring is different from most other harnesses in that the properly fitted harness when hitched will have the horse held lightly between pulling and pushing. The video is a good way to set up a team for someone that has not seen it before. Tension between the rear tugs and the front side straps creates the geometry that holds up the tongue. Taking the slack out of the britchen and belly band ensures that the D-ring stays where it belongs — centered on the horse. Once the horses are hooked, the front side straps are adjusted to hold up the tongue and take all the weight off the collar. The tugs are typically hooked tighter than with most other harnesses. Some folks like to just use a knee on the single tree while hooking the last tug tight, others will leave one front side strap loose and tighten that after hooking all the tugs.